How to take a screenshot on windows

As a software reviewer at PCMag, snapping screenshots is something I need to do many times each day. There’s no better way of showing readers how a program actually looks in operation than by showing screenshots. I mostly review Windows software, so I’m familiar with the various ways to capture screens on that operating system. Nearly every computer user occasionally needs to take a screenshot, if only to share what they’re seeing on the screen with a colleague.
It’s astonishing how long it has taken to perfect this simple capability. Windows has had screen-printing capabilities since the first PCs in the 1980s (their text-based option differed from today’s raster screenshots). Windows 10 introduced new ways to take screenshots, like using the Snip & Sketch utility, and taking screenshots in Windows 11 is even smarter with its version of the Snipping Tool.
Here, we’re concerned with screenshots in Windows 10. Below, I walk you through the several ways to capture the Windows 10 PC screen so that you can make an informed decision on which method works best for you.
1. Use Shift-Windows Key-S and Snip & Sketch
After many years of using Snagit (see below), this has become my primary screenshot method: Press the keyboard combo Shift-Windows Key-S, and you have a choice of capturing the full screen, a rectangular selection, a freehand selection, or an individual program window. An alternative way to invoke Snip & Sketch is via the Action Center’s Screen Snip button.
After using this keyboard shortcut, you momentarily see a small thumbnail panel notification at the lower right that says Snip Saved to Clipboard. Tap this to open the Snip & Sketch window. In this, you can crop the image and mark it up with a pen, pencil, highlighter, eraser, ruler. Then you can save the image to a folder of your choice, or share it using the standard Windows Share menu. That lets you send it to Instagram, Messenger, Mail, or any other app that accepts the file type. It also lets you send it to a nearby PC with Nearby Sharing enabled.
A couple things I wish Snip & Sketch had are text overlay and basic shapes, including the ever-useful arrow. If you only want to use this tool, you can go into Windows’ Settings app and choose Ease of Access > Keyboard and choose Use the PrtSc Button to Open Screen Snipping. Note that this requires restarting Windows.
2. Use the Print Screen Key With Clipboard
This is the longtime classic method of screenshotting in Windows 10. It’s especially useful for shooting apps that change appearance when you hit a keyboard combination. Often a menu will collapse as soon as you tap a shift key. Hitting the Print Screen or PrtSc key copies the entire screen to the Clipboard; adding Alt together with Print Screen copies only the active window rectangle.
You do need to take extra steps to open and save your image in an application that deals with images, such as Paint, Paint 3D, or even Photoshop (unless you take advantage of the next tip). Simply paste with Ctrl-V when you’re in a new document in one of those apps, and then you can go to town with editing, and finally, save the image to the folder of your choice.
3. Use Print Screen Key With OneDrive
This is one of the best things ever to hit screenshots in Windows, having arrived in 2015. As with the plain-old Print Screen key, you can save the entire screen or the active window with Print Screen or Alt-Print Screen, respectively. But after you go to OneDrive’s Settings panel and choose Automatically Save Screenshots/Capture to OneDrive from the Backup tab, you’re saved from having to open an image app, paste from the clipboard, and then save the file. Hit Print Screen, and you’ve got an image file saved, all in one step.
Windows’ Action Center (the slide-out panel on the right side of the screen) notifies you that your shot was saved, and you can click on the notification to take you right to the folder where it’s saved. If you use this method a lot, you’ll probably want more cloud storage than just the free 5GB. An Office 365 account (starting at $6.99 per month) gets you 1TB, as well as all the famous productivity applications.
4. Use the Windows Key-Print Screen Shortcut
This method was introduced with Windows 8, but it still works in Windows 10. It’s simpler than some of the other methods in this story. On tablets like the Surface Pro, you invoke this functionality by pressing the Volume Down and Power buttons at the same time. This or Windows Key-Print Screen key combo will momentarily darken the screen to show you it worked, and instantly save a PNG image file to your Pictures > Screenshots folder.
Alt-Windows Key-Print Screen saves just the active window, but, interestingly, this uses the Windows Game Bar (see next slide) functionality, saving your screenshot to your Videos/Captures folder. Both of these methods are good if you want instant saving without having to bother with the Clipboard or OneDrive cloud storage.
5. Use the Windows Game Bar
Windows Key-G opens the Game bar, which includes an icon looking like a webcam. Tap this to open the Capture section, which has a camera icon. Tap that, and your screenshot is saved to the Videos/Captures folder under your main user folder.
6. Use Snagit or Another Third-Party Utility
Another way to take screenshots is by using a third-party tool. Our favorite screenshot app at PCMag is Snagit. Snagit has at least one major benefit over Windows’ built-in screenshot tools: You can snap away and all your shots remain in the utility’s repository, available at any time you might need them later. It’s the least disruptive way to shoot screens while continuing your work. After you’re ready to deal with the shots, you can browse the history and save the images you want to the folder of your choice.
Snagit also includes advanced tools like video and scrolling window screenshot tools. It offers handy image-editing and drawing tools, including brightness, arrows, text overlay, and borders. The downside? A Snagit license will set you back $62.99, but for those who need its advanced functionality, it’s worth the money.
Other good third-party screenshot options include Ashampoo Snap, Droplr, and Screencast-O-Matic. You can read about all of these in our Best Screen-Capture Apps roundup.
7. Double-Click Your Surface Pen
If you’re on a digital-inking-capable touch-screen PC like a Surface Pro, you can take a screenshot of your full screen simply by double-clicking on the Back button on a Surface Pen. This opens Snip and Sketch with the full screenshot ready for annotating, editing, and sharing.
Source- https://www.pcmag.com/how-to/how-to-take-screenshots-in-windows-10
How to Take a Screenshot on your PC, Phone or Tablet
Taking a screenshot is an important skill for young people and parents to have. This article will show you how to Screenshot an image on your mobile phone, computer and tablet. Not only are screenshots useful for demonstrating computer programs and accessing online resources when you don’t have an internet connection, but they are essential for recording evidence of cyberbullying.
It must be acknowledged that screenshots can be used to instigate bullying, as they allow the taker of the screenshot to copy incriminating photos and messages. However, in order for a young person to be prepared to handle cyberbullying situations, it is crucial that he/she knows how to record evidence of cyberbullying through taking screenshots.
What is a Screenshot?
But first, what exactly is a screenshot? A screenshot or screen capture is a picture taken by a computer, mobile or tablet user, using the device in question, to record the visible items displayed on the screen. The image is stored as a graphics file. Screenshots can be taken using various programs or by using particular keyboard/button shortcuts.
How to Take a Screenshot on a Computer
Windows
- Hit the PrtScn button/ or Print Scrn button, to take a screenshot of the entire screen: When using Windows, pressing the Print Screen button (located in the top right of the keyboard) will take a screenshot of your entire screen. Hitting this button essentially copies an image of the screen to the clipboard. Where does it go? Well, you have to open Word, Paint or some other image editing program to view, edit or save the image. For example, open Word and click Ctrl and v. This is a shortcut instead of right-clicking the mouse and selecting paste. If you’d like to capture only the active window press the Alt and PrtScn buttons together and paste into your document like above.
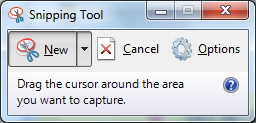
Use the Snipping Tool program to take and edit screenshots: If you’re having difficulty locating or using the Print Screen key you might prefer to use Snipping Tool. Snipping Tool is a program that is included for free with Windows 7,
- Windows Vista, and a number of other Windows products. It allows you to take screenshots easily by clicking New and then selecting the area that you’d like to screenshot. You can then edit the screenshot, using highlighter and pen tools. Snipping Tool is just one of the numerous tools available to assist you in taking screenshots.
Some laptops, in particular, mightn’t have a PrtScn key. The user manual that came with your machine should have instructions on different key combinations that can be used for taking screenshots.
How to Take a Screenshot on your PC, Phone or Tablet
Taking a screenshot is an important skill for young people and parents to have. This article will show you how to Screenshot an image on your mobile phone, computer and tablet. Not only are screenshots useful for demonstrating computer programs and accessing online resources when you don’t have an internet connection, but they are essential for recording evidence of cyberbullying.
It must be acknowledged that screenshots can be used to instigate bullying, as they allow the taker of the screenshot to copy incriminating photos and messages. However, in order for a young person to be prepared to handle cyberbullying situations, it is crucial that he/she knows how to record evidence of cyberbullying through taking screenshots.
What is a Screenshot?
But first, what exactly is a screenshot? A screenshot or screen capture is a picture taken by a computer, mobile or tablet user, using the device in question, to record the visible items displayed on the screen. The image is stored as a graphics file. Screenshots can be taken using various programs or by using particular keyboard/button shortcuts.
How to Take a Screenshot on a Computer
Windows
- Hit the PrtScn button/ or Print Scrn button, to take a screenshot of the entire screen: When using Windows, pressing the Print Screen button (located in the top right of the keyboard) will take a screenshot of your entire screen. Hitting this button essentially copies an image of the screen to the clipboard. Where does it go? Well, you have to open Word, Paint or some other image editing program to view, edit or save the image. For example, open Word and click Ctrl and v. This is a shortcut instead of right-clicking the mouse and selecting paste. If you’d like to capture only the active window press the Alt and PrtScn buttons together and paste into your document like above.
- Use the Snipping Tool program to take and edit screenshots: If you’re having difficulty locating or using the Print Screen key you might prefer to use Snipping Tool. Snipping Tool is a program that is included for free with Windows 7,Windows Vista, and a number of other Windows products. It allows you to take screenshots easily by clicking New and then selecting the area that you’d like to screenshot. You can then edit the screenshot, using highlighter and pen tools. Snipping Tool is just one of the numerous tools available to assist you in taking screenshots.
Some laptops, in particular, mightn’t have a PrtScn key. The user manual that came with your machine should have instructions on different key combinations that can be used for taking screenshots.
Mac
- Hit the Command, Shift and 3 keys together to take a screenshot of the entire screen: When using Mac, pressing the Command, Shift and 3 buttons together will take a screenshot of your entire screen. This screenshot will be automatically saved to your desktop. Press the Command, Shift and 4 keys together to take a screenshot of a selected area.
- Use the Grab tool to take a screenshot: An alternative to the keyboard shortcuts on Mac is to use the Grab tool. Grab is a program that is included for free with Macs. It allows you to take screenshots easily by clicking Capture and then selecting the type of screenshot that you’d like to take. Grab is just one of the numerous tools available to assist you in taking screenshots.
How to Take a Screenshot on a Smartphone/Tablet
How to take a screenshot on a smartphone or tablet varies depending on the operating system and device used. The easiest way to find out how to screenshot on your individual device is to search online. The following videos, available on Youtube, show how to take screenshots with some of the most popular phones and tablets. Generally speaking, to take a screenshot on a phone or tablet, you press the power key and the home button at the same time. Your screenshot will add itself to your gallery.
How to Take a Screenrecord on a Phone
Please be aware that many phones nowadays can screen record, meaning that they can record videos of the screen. A third party app is needed for Android phones or older IoS phones. The Apple iOS 11 or later, has built-in screen record capabilities. These can be turned on by going to Settings/ Control Centre/ Customise Controls/ Screen Recording. You can access the screen recording feature in your control panel by swiping up on the home screen. Recordings are saved onto the camera roll. For details on how to set up screen record on iOS:
Source- https://www.webwise.ie/parents/take-screenshot/

